This is like a reference for eq-ing anything you need.
General:
20 Hz and below - impossible to detect, remove as it only adds unnecessary energy to the total sound, thereby most probably holding down the overall volume of the track
60 Hz and below - sub bass (feel only)
80(-100) Hz - feel AND hear bass
100-120 Hz - the “club sound system punch” resides here
200 Hz and below - bottom
250 Hz - notch filter here can add thump to a kick drum
150-400 Hz - boxiness
200 Hz-1.5 KHz - punch, fatness, impact
800 Hz-4 KHz - edge, clarity, harshness, defines timbre
4500 Hz - exteremly tiring to the ears, add a slight notch here
5-7 KHz - de-essing is done here
4-9 KHz - brightness, presence, definition, sibilance, high frequency distortion
6-15 KHz - air and presence
9-15 KHz - adding will give sparkle, shimmer, bring out details - cutting will smooth out harshness and darken the mix
EQ Reference: Frequencies
50Hz
Boost: To thicken up bass drums and sub-bass parts.
Cut: Below this frequency on all vocal tracks. This should reduce the effect of any microphone ‘pops’.
70-100Hz
Boost: For bass lines and bass drums.
Cut: For vocals.
General: Be wary of boosting the bass of too many tracks. Low frequency sounds are particularly vulnerable to phase cancellation between sounds of similar frequency. This can result in a net ‘cut of the bass frequencies.
200-400Hz
Boost: To add warmth to vocals or to thicken a guitar sound.
Cut: To bring more clarity to vocals or to thin cymbals and higher frequency percussion.
Boost or Cut: to control the ‘woody’ sound of a snare.
400-800Hz
Boost: To add warmth to toms.
Boost or Cut: To control bass clarity, or to thicken or thin guitar sounds.
General: In can be worthwhile applying cut to some of the instruments in the mix to bring more clarity to the bass within the overall mix.
800Hz-1KHz
Boost: To thicken vocal tracks. At 1 KHz apply boost to add a knock to a bass drum.
1-3KHz
Boost: To make a piano more aggressive. Applying boost between 1KHz and 5KHz will also make guitars and basslines more cutting.
Cut: Apply cut between 2 KHz and 3KHz to smooth a harsh sounding vocal part.
General: This frequency range is often used to make instruments stand out in a mix.
3-6KHz
Boost: For a more ‘plucked’ sounding bass part. Apply boost at around 6KHz to add some definition to vocal parts and distorted guitars.
Cut: Apply cut at about 3KHz to remove the hard edge of piercing vocals. Apply cut between 5KHZ and 6KHz to dull down some parts in a mix.
6-10KHz
Boost: To sweeten vocals. The higher the frequency you boost the more ‘airy/breathy’ the result will be. Also boost to add definition to the sound of acoustic guitars or to add edge to synth sounds or strings or to enhance the sound of a variety of percussion sounds. For example boost this range to:
Bring out cymbals. Add ring to a snare. Add edge to a bass drum.
10-16KHz
Boost: To make vocals more ‘airy’ or for crisp cymbals and percussion. Also boost this frequency to add sparkle to pads, but only if the frequency is present in the original sound, otherwise you will just be adding hiss to the recording.
Individual Instruments, what frequencies do what.
Kicks:
60Hz with a Q of 1.4 — Add fullness to kicks.
5Khz with a Q of 2.8 — Adds attack to Kicks
bottom (60 - 80 Hz),
slap (4 kHz)
EQ - Cut below 80Hz to remove rumble
Boost between 80 -125 Hz for bass
Boost between 3 - 5kHz to get the slap
Processing - Compression 4:1/6:1 slow attack med release.
Reverb:Tight room reverb (0.1-0.2ms)
Snares:
200Hz - 250Hz with a Q of 1.4 — Adds wood to snares
3Khz with a Q of 1.4 — Adds attack to snare.
7Khz with a Q of 2.8 — Adds Sharpness to snares and percussion
fatness at 120-240Hz
boing at 400Hz
crispness at 5kHz
snap at 10kHz
fatness (240 Hz), crispness (5 kHz)
EQ - Boost above 2kHz for that crisp edge
Cut at 1kHz to get rid of the sharp peak
Boost at 125Hz for a full snare sound
Cut at 80Hz to remove rumble
Processing - Compression 4:1 slow attack med release.
Reverb: Tight room reverb (0.1-0.2ms)
Vocals
Fullness at 120 Hz, boominess at 200 - 240 Hz, presence at 5 kHz, sibilance at 7.5 - 10 kHz
General: Roll off below 60Hz using a High Pass Filter. This range is unlikely to contain anything useful, so you may as well reduce the noise the track contributes to the mix.
Treat Harsh Vocals: To soften vocals apply cut in a narrow bandwidth somewhere in the 2.5KHz to 4KHz range.
Get An Open Sound: Apply a gentle boost above 6KHz using a shelving filter.
Get Brightness, Not Harshness: Apply a gentle boost using a wide-band Bandpass Filter above 6KHz. Use the Sweep control to sweep the frequencies to get it right.
Get Smoothness: Apply some cut in a narrow band in the 1KHz to 2KHz range.
Bring Out The Bass: Apply some boost in a reasonably narrow band somewhere in the 200Hz to 600Hz range.
Radio Vocal Effect: Apply some cut at the High Frequencies, lots of boost about 1.5KHz and lots of cut below 700Hz.
Telephone Effect: Apply lots of compression pre EQ, and a little analogue distortion by turning up the input gain. Apply some cut at the High Frequencies, lots of boost about 1.5KHz and lots of cut below 700Hz.
Hats:
10Khz with a Q of 1.0 — Adds brightness to hats and cymbals
Hi Hat & Cymbals: sizzle (7.5 - 10 kHz), clank (200 Hz)
EQ - Boost above 5kHz for sharp sparkle
Cut at 1kHz to remove jangling
Processing - Compression use high ratio for high energy feel
Reverb: Looser than Bass n Snare allow the hats and especially the Rides to ring a little
Get Definition: Roll off everything below 600Hz using a High Pass Filter.
Get Sizzle: Apply boost at 10KHz using a Band Pass Filter. Adjust the bandwidth to get the sound right.
Treat Clangy Hats: Apply some cut between 1KHz and 4KHz.
Hi hats/cymbals - clank or gong sound at 200 Hz, shimmer at 7.5 kHz - 12 kHz
Toms:
Toms - attack (5 kHz), fullness (120 - 240 Hz)
rack toms - fullness at 240 Hz, attack at 5 kHz
floor toms - fullness at 80 - 120 Hz, attack at 5 kHz
Percussion:
conga/bongo - resonance at 200 - 240 Hz, slap at 5 kHz
Guitar:
Treat Unclear Vocals: Apply some cut to the guitar between 1KHz and 5KHz to bring the vocals to the front of the mix.
General: Apply a little boost between 100Hz and 250Hz and again between 10KHz and 12KHz.
fullness (240 Hz), bite (2.5 kHz), air / sizzle (8 kHz)
Acoustic Guitar:
Add Sparkle: Try some gentle boost at 10KHz using a Band Pass Filter with a medium bandwidth.
General: Try applying some mid-range cut to the rhythm section to make vocals and other instruments more clearly heard.
harshness / bite (2 kHz), boominess (120 - 200 Hz), cut (7 - 10 kHz)
Bass Guitar:
bottom (60 - 80 Hz), attack (700 - 1000 Hz), string noise (2.5 kHz)
Horns
fullness at 120 - 240 Hz, shrill at 5 - 7.5 kHz
Strings
fullness at 240 Hz, scratchiness at 7.5 - 10 kHz
Happy EQing.
Obi Audio (great site for Pro Audio)
Monday, February 2, 2009
Sunday, February 1, 2009
Getting pro sounding recordings on a budget.
After you get a DAW up and running it's time to get some recording done.
The cheapest way: M-Audio Audiophile 192, Rane MS-1b, SM58/SM57 mic. Pro recordings can be done with this. $450
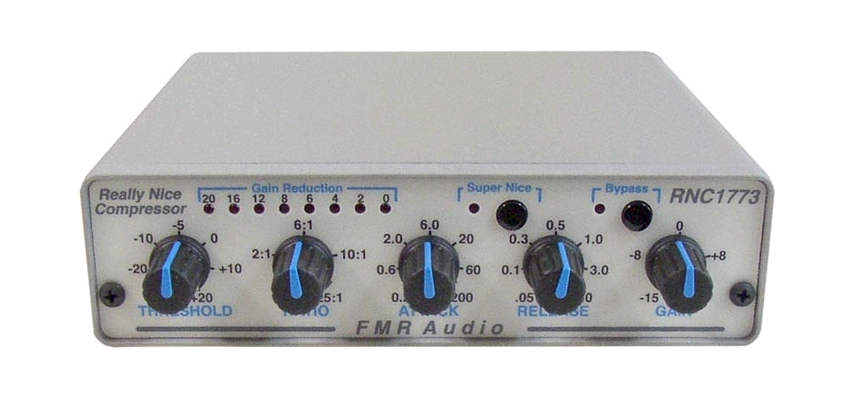
The step-up: M-Audio Audiophile 192, Grace Design 101 or True Systems P-Solo or FMR - RNP "really nice mic-pre", FMR RNC "really nice compressor" (optional), SM7b mic. $950w/o compressor, $1150 with compressor.
Million Dollar sound for as cheap as it gets: M-Audio Audiophile 192, Black Lion Sparrow, any great mic pre (Trident S20, UA 610, Brent Averill 1272), FMR RNC "really nice compressor", Bock Audio 195. $3,000 [the only thing I might want to upgrade here eventually would be the compressor to a LA-2A, a 1176, a TubeTech, or a Distressor]
All of these set-ups will give you pro quality recordings. Just different levels of pro sound. But remember that how good your recordings will sound has everything to do with how you use your equipment and how good your mixing, eq, and mastering is. If you record everything perfect you can always ship your tracks to a mixing and mastering engineer untill you learn how to do it yourself.
Other needed equipment. Monitors, cables, headphones, and a headphone amp. Check my list of equipment at great values in one of my other post.
The cheapest way: M-Audio Audiophile 192, Rane MS-1b, SM58/SM57 mic. Pro recordings can be done with this. $450
The step-up: M-Audio Audiophile 192, Grace Design 101 or True Systems P-Solo or FMR - RNP "really nice mic-pre", FMR RNC "really nice compressor" (optional), SM7b mic. $950w/o compressor, $1150 with compressor.
Million Dollar sound for as cheap as it gets: M-Audio Audiophile 192, Black Lion Sparrow, any great mic pre (Trident S20, UA 610, Brent Averill 1272), FMR RNC "really nice compressor", Bock Audio 195. $3,000 [the only thing I might want to upgrade here eventually would be the compressor to a LA-2A, a 1176, a TubeTech, or a Distressor]
All of these set-ups will give you pro quality recordings. Just different levels of pro sound. But remember that how good your recordings will sound has everything to do with how you use your equipment and how good your mixing, eq, and mastering is. If you record everything perfect you can always ship your tracks to a mixing and mastering engineer untill you learn how to do it yourself.
Other needed equipment. Monitors, cables, headphones, and a headphone amp. Check my list of equipment at great values in one of my other post.
Getting a good DAW for cheap.
The major issues hear: CPU power, amount of RAM and speed of it, harddrive performance, ASIO soundcard, and software.
check out www.pricewatch.com for cheap computers or go around to yard sales and pick up non working computers for parts. I just built a dual core intel machine with 2 gb of ram for under $150 using spare parts I found.
Make sure that your cpu is at least dual-core. You need at least 1-2 gb of ram. The higher the number the better. Like 800 is better than 400. You need at least 160gb of harddrive space with a seperate harddrive for recording if you can afford it.
For soundcard get anything that has an ASIO driver. Any studio soundcard will do. Check out M-Audio soundcards. Firewire is better than USB and some people prefer PCI soundcards. Don't buy soundblasters.
Many soundcards come with recording software. If you don't have any DAW software you might want to buy a soundcard that comes with Cubase 4 Le. It's a great piece of software for free with good soundcards such as the Presonus Firebox.
The only softwares that i've really liked have been Cubase/Nuendo and ProTools. Sonar, Reaper, and Ableton Live are all good but they just weren't for me. Remember that Reaper is a great value.
For making instrumentals outside of recording software I like FL Studio and Reason.
List of great gear for a great value
FMR - RNC "Really Nice Compressor" at less than $200 this is a great investment for hardware compression. This unit compairs to units that cost over 5 times the price.
Bock Audio Mics - Many people compare the 195 to the U87. But it sounds better at less than 1/3 of the price. ~$1,000 And the 151 is a vocal version of the 251 replica which at $3,000 is still a steal.


Rane - MS1b - For about $150 you can get a mic preamp that is actually worth using.

M-Audio - DMP3 - For about $150 you get two channels with d.i. inputs and VU meters. Not bad for the starting project studio.

Presonus - Blue Tube - Many people abuse the tube in this getting terrible recordings but with low drive settings and the right mic you can get usable recordings. Try the Bluebird mic on this. Pure magic. I don't know why. $199. Or get the single channel version Tube Pre for $99.

Black Lion Audio - Sparrow - At about $650 this kills every other converter that I've ever used. This is one of the best values I've ever seen. Pro converters for under $1,000.

Shure - SM7b - One of my favorite mics. Very surprising. Perfect for hip-hop. Used by David Banner and many others. Used on the Thriller Album for background vocals. Used in Country and Rock music. $250. Needs a good preamp to really push it though.

M-Audio - Audiophile 192 - Really a great sounding and low latency soundcard for the money. At less than $200 you can get the best soundcard in it's price range. Also runs with ProTools M-Powered.

M-Audio - Firewire 410/Profire 610 - Blows the M-box away. Just the output converters put the m-box2 to shame. Don't buy the M-box unless you are looking for a usb protools interface. Even then I might still go with a M-Audio Fasttrack Pro. About $300

Alesis - M1 Active MKII - Actually good mixing speakers if you take the time to get use to them. They don't have banging bass but that's not the most important thing when getting good mixes. Good for $300.

Yamaha - HS50m - At less than $400 a pair they are some of the easiest to learn mixing speakers and deliver great mixes. Don't waste your money on the 8" HS80m's. They don't deliver like these little guys.

Shure - SM57/SM58 - Every studio should have at least one. Great for hip-hop vocals and recording guitar amps. Also try the Audix i5. Same sound and price but built like a tank.

Sony - MDRV150 - At $15 these are the workhorse headphones of the poorman's studio. Not the best for booth use but come on. They are $15. I have a great pair for me to use, a good pair for the booth, and these for everyone else that wants to listen.

This will be updated regularly. Check back often.
Bock Audio Mics - Many people compare the 195 to the U87. But it sounds better at less than 1/3 of the price. ~$1,000 And the 151 is a vocal version of the 251 replica which at $3,000 is still a steal.
Rane - MS1b - For about $150 you can get a mic preamp that is actually worth using.
M-Audio - DMP3 - For about $150 you get two channels with d.i. inputs and VU meters. Not bad for the starting project studio.
Presonus - Blue Tube - Many people abuse the tube in this getting terrible recordings but with low drive settings and the right mic you can get usable recordings. Try the Bluebird mic on this. Pure magic. I don't know why. $199. Or get the single channel version Tube Pre for $99.
Black Lion Audio - Sparrow - At about $650 this kills every other converter that I've ever used. This is one of the best values I've ever seen. Pro converters for under $1,000.
Shure - SM7b - One of my favorite mics. Very surprising. Perfect for hip-hop. Used by David Banner and many others. Used on the Thriller Album for background vocals. Used in Country and Rock music. $250. Needs a good preamp to really push it though.
M-Audio - Audiophile 192 - Really a great sounding and low latency soundcard for the money. At less than $200 you can get the best soundcard in it's price range. Also runs with ProTools M-Powered.
M-Audio - Firewire 410/Profire 610 - Blows the M-box away. Just the output converters put the m-box2 to shame. Don't buy the M-box unless you are looking for a usb protools interface. Even then I might still go with a M-Audio Fasttrack Pro. About $300
Alesis - M1 Active MKII - Actually good mixing speakers if you take the time to get use to them. They don't have banging bass but that's not the most important thing when getting good mixes. Good for $300.
Yamaha - HS50m - At less than $400 a pair they are some of the easiest to learn mixing speakers and deliver great mixes. Don't waste your money on the 8" HS80m's. They don't deliver like these little guys.
Shure - SM57/SM58 - Every studio should have at least one. Great for hip-hop vocals and recording guitar amps. Also try the Audix i5. Same sound and price but built like a tank.
Sony - MDRV150 - At $15 these are the workhorse headphones of the poorman's studio. Not the best for booth use but come on. They are $15. I have a great pair for me to use, a good pair for the booth, and these for everyone else that wants to listen.
This will be updated regularly. Check back often.
Setting up a channel strip for recording vocals.
This is my channel strip setting guide that will work for almost any compressor, eq, pre amp set up. This is based on the Eureka though. But it still applies to other channel strips.
This will be for vocals.
Set everything to default.
PRE AMP- Line button [out], 48v [in] (for phatom powered mics), -20 db [out] (unless your signal is really loud then press in and start at step one agian), 80hz cut [in] (reduces boomyness), phase [out] (unless you have phase issues), Gain all the way down, impedance to match mic, saturate down (or to taste, mine is half up).
COMPRESSOR- Thresh to 0db, Attack between 9-11 o'clock, ratio to 1:1, Release between 12-3 o'clock, Gain to 0db, Sidechain 10 Hz. Soft [in], Bypass [in]
EQ- All to 0db. Eq>CMP [out] (could be used in), Bypass [in]
MASTER- 0db, GR to meter [out].
***Please read all of the setting marks on the Eureka (or your channel strip)***
Steps:
1) with someone doing a mic check slowly raise the gain untill the VU meter reads close to 0 dbVU without going over too bad though this unit doesn't clip easily.
2) Now turn bypass on the compressor off and the GR to meter on in the master section. Now turn the ratio to 4:1. Now turn the threashold slowly clockwise untill the VU meter starts hitting -3db at the peaks.
3) Now turn the GR to meter back off and turn the gain on the compressor so that it get back to 0dbVU in the meter.
4) Turn the eq bypass off. Then tweak eq to taste.
5) If you do alot of boosting with the eq then turn the master down to get a 0db reading in the meter. Turn up the master gain if you do alot of cutting. If no eq-ing is done then leave the master gain at 0dbVU (at 12 o'clock)
This is settings for general music recording applications.
For Hip-Hop or Rock vocals you might want to try a ratio of 8:1 with about -5db of gain reduction.
Remember that some DAW software uses a dbFS meter for input signal which is different than a dbVu meter. You want 0 dbVu which equals about -18 dbFs. Hope this helps.
Subscribe to:
Posts (Atom)
