By Peter Wetherbee
The only thing that'll glue together pulsing drums, gnarly synths, gargantuan bass lines and your favorite spatial ear-candy tricks into a perfectly balanced, ready-for-prime-time mix is compression. Although in the wrong hands it'll suck the life out of your song, compression can be a psychoacoustic elixir that magically smooths out janky sounds, and it will even bring forth texture and harmonic richness from a track that was previously “unfixable” with EQ, reverb or any other effects.
Once you get the hang of compression — which is as addictive as it is satisfying — you will start to integrate it frequently into your recording process, resulting in more professional, solid tracks that will require less work in mixdown. It'll help you take fuller advantage of your recorder's specs and improve signal-to-noise ratios. And you will also capture more of the harmonic and dynamic complexities of your source material with a well dialed-in compressor, resulting in deeper tracks with more life and soul.
Although my pitch may sound sort of like a drug dealer or a holy-rolling televangelist, these are not the idle promises of a music-store salesman or marketing exec. Our only goal here is better-sounding music, and you probably already have underused compressors waiting for you in your DAW or gathering dust in the studio. This article should help neophytes fly fearlessly into the wild world of dynamics processing, while hopefully inspiring experienced squashologists to stay fresh and sweet in their gain-structure alchemy. This knowledge will make your tracks pump, slam and breathe with deeper vibe than ever before.
WARMING UP
There are several aspects involved in the unassuming yet enigmatic arts of compression — and why our ears crave it whether we know it or not. For one thing, most everything recorded before the '80s (before digital recording became widespread) was recorded to analog tape, which imparts its own series of very nonlinear compression and equalization characteristics, especially to hot low-end signals that hit the tape hard, such as kick drums and bass tracks. It is not to be underestimated how much our ears have been tuned — through '80s pop music, especially — to the sound of sweet compression, simply because that stuff was recorded and mixed to tape.
Find related books, DVDs, tutorials, guides and resources here...
Recording
Music Production
Furthermore, the gulf between perceived loudness and actual levels — and all that Fletcher-Munson and other nonlinear wave and aural esoterica found in the realms of deep physics — is aided, abetted and transcended by ear-friendly compressors. It just isn't very pleasant to listen to someone singing and playing an acoustic guitar if they are standing next to someone slamming a drum kit. That would be an impossibly painful and ridiculous proposition to our naked ears, but it is a pop-music staple thanks to the magical mysteries of our friend the compressor.
We are so accustomed to hearing the individual elements of trap drums balanced with compressors to varying and layered degrees that few of us know what a drum kit really sounds like. Furthermore, compressors allow us to bring out the subtleties and complexities of a drummer's performance that even the musician playing could never possibly hear.
There is much more to compression than simply taming wild sounds and reining in sonic mayhem. A good compressor will actually help bring out the animal in a performance. Dial in the right settings, and your track gets in your face, threatening to burst out of the speakers like an uncaged beast. Fatness, punch, thickness, aggressive texture, width and groove are all fundamental goals when inserting your hardworking dynamics processor into the signal path.
Originally designed in the mid-20th century to keep music from overloading radio transmissions or from grinding through acetate plates, some of the early compressors were as unwieldy as a refrigerator. Like a Harley-Davidson or a tube amplifier, the design of a good compressor is not based on efficiency or frugal use of power. The Fairchild 670, with its 14 huge transformers, is still one of the rarest and most sought-after processing sounds many decades after it was built, but it will cost you as much as the fully loaded SUV you'll need to transport it to the studio.
Meanwhile, two of my favorites are the dbx 165 and Urei LA3A. Like many of the best compressors, they have very weird electronics that transform the audio signal to light (no joke) and read the brightness of that light with a photo-optical cell that determines how and when they kick in. Others use tubes, simple voltage-controlled circuits or combinations of both, and they vary greatly depending on age, accumulated grime and breakdown of components — all of which contribute to how each unit works and sounds. Even if they have consecutive serial numbers, two will rarely sound the same. Then there is the plethora of DAW plug-in emulations that are meticulously crafted to capture the characteristic wheezing inefficiencies of each of the above.
THE BIG SQUEEZE
Unless you are a trained audio engineer, you probably don't really know what compressors do, and plenty of people who actually understand their function still don't know what to do with them. The paradox is that compression is a subtle signal processor — as opposed to reverb, distortion, a filter sweep, etc. — that is nevertheless more powerful psychoacoustically than just about any other single type of gear you can use on a track. It is likely that a vast majority of the sounds that make up the music you listen to are significantly compressed — often multiple times — to make them throb smoothly in your earholes.
To say that a compressor generally works by reducing an audio signal's level by a certain ratio above a specified threshold would be to reduce its magic to a simple truth that doesn't even begin to tell the story. For one thing, the most interesting elements of that gain reduction occur in its attack and release stages, the slopes of which are rarely consistent. Without getting hung up on largely irrelevant technical details, let's just start by saying that compressors lower the levels of peaks and allow us to bring up the overall level of a signal without clipping.
Imagine a guy listening to a track with his finger on a fader, lowering the fader a little when the signal gets too loud, and bringing it back up when the signal gets quieter. How fast he lowers the fader for hot signals would be the “attack” of his gain-reduction process, and how quickly he returns the fader to unity after the signal gets quieter again would be the “release” time of his compression. The personality of this guy moving the fader, and how smoothly he moves it, determines the musicality of the compressor. If the dude has had too much coffee, he might be a little jerky, perhaps even anticipating what's coming musically; if he's been drinking cold medicine and brandy, or if he's never heard the track before, he might be a little slower to respond overall.
Either scenario could be musically pleasing or might cause an unpleasant “pumping” that feels unrelated to the program material. Conventional wisdom says that to avoid pumping or other undesirable artifacts (in other words, for the compression to be as effective yet transparent as possible), the attack should not be fast enough to swallow the natural rise of the signal, and the release should fall most of the way back before the next signal peak. And both should be as consistent as possible.
COLOR BY NUMBERS
Here is a basic approach for getting your feet wet with compressor parameters. If you are not feeling too confident about it, take a conservative approach to find your settings, and crank it up from there.
Insert your compressor into a mixer channel or DAW track that has a drum loop or something similar with consistent peaks or spikes, such as kick and snare drums.
Set the Ratio control somewhere around the 5:1 or 7:1 range.
Set the Attack control as slow as possible, for the longest response time.
Set the Release control at the faster, shortest response time.
Look at the Gain Reduction meter to see how much compression is occurring, and listen to what happens as you lower the Threshold control.
After making a mental note about what this sounds like, bring the Threshold or Compression knob back to where it is just barely triggering the meter slightly with peaks.
Sweep the Attack control from slowest to fastest settings and find the setting where it just starts to clip the beginning of the peak sounds it is triggering — where you can clearly hear it doing something. Now pull back to a slightly slower spot, where you still hear the original sound clearly but the compressor is kicking in a little.
Sweep the Release control from fastest to slowest and find the setting where the meter has time to recover before the next peak triggers it again.
You are now in the ballpark. The next step is to determine whether it can do something useful for your programmed material. If necessary, adjust the Threshold control to a place where the meter is kicking in fairly regularly.
Now go back to the Ratio control and sweep from 1:1 (no compression) through infinity:1 (brickwall limiting). Find a good-sounding setting and check that what you are hearing starts to correspond with what you are seeing on the meter.
Finally, adjust the Output or Makeup Gain control to find an overall level that is as close as possible to the original signal. That allows you to use a Bypass or similar switch to go back and forth between the compressed and unprocessed signal to see if you like what the compressor is doing without being misled by one or the other simply being louder than the other.
COMPRESSION DISCRETION
If one set of settings is louder, it will usually seem like the better setting; our brains and ears generally tend to think that louder is better. Therefore it is absolutely crucial to match the levels of processed and unprocessed signals as closely as possible if we really want to be able to make a useful assessment of what is going on with the compressor. Use your eyes to see the compression happening to help your ears learn what it sounds like, and try not to think too much about the process. One good thing about compressors is that they are somewhat forgiving once you are in the ballpark as far as attack and release settings are concerned, which can be very helpful when you are recording 10 or 20 tracks at a time.
Try going through the previously discussed steps with bass, percussion loops or a James Brown-type of chunky, jangling guitar. If you can play an instrument live into the compressor, you will be surprised at how good it'll make you sound with the right basic settings. The trick is to be able to suss out what's needed quickly, and once you get the hang of it, things'll simply sound better: punchier, solid, smooth and fat.
While tasteful compression lets you pull disparate tracks together into a cohesive relationship in a mix, too much of this good thing will make your track sound dull and will take the vibe right out of even the best performance. So at first, be careful and try to err on the side of subtlety because compression is like distortion: Once it's there, it's pretty hard to get rid of, but you can always add more later.
From: Remix Mag Jun 1, 2007
Obi Audio (great site for Pro Audio)
Sunday, June 7, 2009
Sunday, April 19, 2009
Starting a Studio Checklist
This is a list of things that you will need for a fulling functioning studio. Listed in the best order I can figure out. Many people will stress something like room treatment being one of the most important things but I rather make music in a less than perfect environment than not make it at all.
01) Computer or D.A.W. (digital audio workstation)
02) Recording Software (this makes your computer a DAW)
03) Studio Audio Interface (also know as a soundcard and must have an ASIO driver)
04) Studio Monitors (the speakers you use for playback and mixing)
05) Midi keyboard (it is difficult to make tracks without one if there is any programming)
06) Mic Preamp (it is REQUIRED for any recording with a mic and many have d.i. inputs for recording instruments directly)
07) Mic (condenser mics require phantom power from the mic pre)
08) Cables (to connect it all) this could be between 3 and 4 because otherwise 4 would be little use.
How much you need of each item will depend on your needs.
Friday, March 6, 2009
Free Reason Refills
This is my collection of personal custom refills and my favorite free refills. All of these are very high quality and many are better than refills that you pay for.
Corey Scott TR-808 refill v3.0
***updated often***
Corey Scott TR-808 refill v3.0
***updated often***
Monday, February 2, 2009
Complete Eq Freq guide.
This is like a reference for eq-ing anything you need.
General:
20 Hz and below - impossible to detect, remove as it only adds unnecessary energy to the total sound, thereby most probably holding down the overall volume of the track
60 Hz and below - sub bass (feel only)
80(-100) Hz - feel AND hear bass
100-120 Hz - the “club sound system punch” resides here
200 Hz and below - bottom
250 Hz - notch filter here can add thump to a kick drum
150-400 Hz - boxiness
200 Hz-1.5 KHz - punch, fatness, impact
800 Hz-4 KHz - edge, clarity, harshness, defines timbre
4500 Hz - exteremly tiring to the ears, add a slight notch here
5-7 KHz - de-essing is done here
4-9 KHz - brightness, presence, definition, sibilance, high frequency distortion
6-15 KHz - air and presence
9-15 KHz - adding will give sparkle, shimmer, bring out details - cutting will smooth out harshness and darken the mix
EQ Reference: Frequencies
50Hz
Boost: To thicken up bass drums and sub-bass parts.
Cut: Below this frequency on all vocal tracks. This should reduce the effect of any microphone ‘pops’.
70-100Hz
Boost: For bass lines and bass drums.
Cut: For vocals.
General: Be wary of boosting the bass of too many tracks. Low frequency sounds are particularly vulnerable to phase cancellation between sounds of similar frequency. This can result in a net ‘cut of the bass frequencies.
200-400Hz
Boost: To add warmth to vocals or to thicken a guitar sound.
Cut: To bring more clarity to vocals or to thin cymbals and higher frequency percussion.
Boost or Cut: to control the ‘woody’ sound of a snare.
400-800Hz
Boost: To add warmth to toms.
Boost or Cut: To control bass clarity, or to thicken or thin guitar sounds.
General: In can be worthwhile applying cut to some of the instruments in the mix to bring more clarity to the bass within the overall mix.
800Hz-1KHz
Boost: To thicken vocal tracks. At 1 KHz apply boost to add a knock to a bass drum.
1-3KHz
Boost: To make a piano more aggressive. Applying boost between 1KHz and 5KHz will also make guitars and basslines more cutting.
Cut: Apply cut between 2 KHz and 3KHz to smooth a harsh sounding vocal part.
General: This frequency range is often used to make instruments stand out in a mix.
3-6KHz
Boost: For a more ‘plucked’ sounding bass part. Apply boost at around 6KHz to add some definition to vocal parts and distorted guitars.
Cut: Apply cut at about 3KHz to remove the hard edge of piercing vocals. Apply cut between 5KHZ and 6KHz to dull down some parts in a mix.
6-10KHz
Boost: To sweeten vocals. The higher the frequency you boost the more ‘airy/breathy’ the result will be. Also boost to add definition to the sound of acoustic guitars or to add edge to synth sounds or strings or to enhance the sound of a variety of percussion sounds. For example boost this range to:
Bring out cymbals. Add ring to a snare. Add edge to a bass drum.
10-16KHz
Boost: To make vocals more ‘airy’ or for crisp cymbals and percussion. Also boost this frequency to add sparkle to pads, but only if the frequency is present in the original sound, otherwise you will just be adding hiss to the recording.
Individual Instruments, what frequencies do what.
Kicks:
60Hz with a Q of 1.4 — Add fullness to kicks.
5Khz with a Q of 2.8 — Adds attack to Kicks
bottom (60 - 80 Hz),
slap (4 kHz)
EQ - Cut below 80Hz to remove rumble
Boost between 80 -125 Hz for bass
Boost between 3 - 5kHz to get the slap
Processing - Compression 4:1/6:1 slow attack med release.
Reverb:Tight room reverb (0.1-0.2ms)
Snares:
200Hz - 250Hz with a Q of 1.4 — Adds wood to snares
3Khz with a Q of 1.4 — Adds attack to snare.
7Khz with a Q of 2.8 — Adds Sharpness to snares and percussion
fatness at 120-240Hz
boing at 400Hz
crispness at 5kHz
snap at 10kHz
fatness (240 Hz), crispness (5 kHz)
EQ - Boost above 2kHz for that crisp edge
Cut at 1kHz to get rid of the sharp peak
Boost at 125Hz for a full snare sound
Cut at 80Hz to remove rumble
Processing - Compression 4:1 slow attack med release.
Reverb: Tight room reverb (0.1-0.2ms)
Vocals
Fullness at 120 Hz, boominess at 200 - 240 Hz, presence at 5 kHz, sibilance at 7.5 - 10 kHz
General: Roll off below 60Hz using a High Pass Filter. This range is unlikely to contain anything useful, so you may as well reduce the noise the track contributes to the mix.
Treat Harsh Vocals: To soften vocals apply cut in a narrow bandwidth somewhere in the 2.5KHz to 4KHz range.
Get An Open Sound: Apply a gentle boost above 6KHz using a shelving filter.
Get Brightness, Not Harshness: Apply a gentle boost using a wide-band Bandpass Filter above 6KHz. Use the Sweep control to sweep the frequencies to get it right.
Get Smoothness: Apply some cut in a narrow band in the 1KHz to 2KHz range.
Bring Out The Bass: Apply some boost in a reasonably narrow band somewhere in the 200Hz to 600Hz range.
Radio Vocal Effect: Apply some cut at the High Frequencies, lots of boost about 1.5KHz and lots of cut below 700Hz.
Telephone Effect: Apply lots of compression pre EQ, and a little analogue distortion by turning up the input gain. Apply some cut at the High Frequencies, lots of boost about 1.5KHz and lots of cut below 700Hz.
Hats:
10Khz with a Q of 1.0 — Adds brightness to hats and cymbals
Hi Hat & Cymbals: sizzle (7.5 - 10 kHz), clank (200 Hz)
EQ - Boost above 5kHz for sharp sparkle
Cut at 1kHz to remove jangling
Processing - Compression use high ratio for high energy feel
Reverb: Looser than Bass n Snare allow the hats and especially the Rides to ring a little
Get Definition: Roll off everything below 600Hz using a High Pass Filter.
Get Sizzle: Apply boost at 10KHz using a Band Pass Filter. Adjust the bandwidth to get the sound right.
Treat Clangy Hats: Apply some cut between 1KHz and 4KHz.
Hi hats/cymbals - clank or gong sound at 200 Hz, shimmer at 7.5 kHz - 12 kHz
Toms:
Toms - attack (5 kHz), fullness (120 - 240 Hz)
rack toms - fullness at 240 Hz, attack at 5 kHz
floor toms - fullness at 80 - 120 Hz, attack at 5 kHz
Percussion:
conga/bongo - resonance at 200 - 240 Hz, slap at 5 kHz
Guitar:
Treat Unclear Vocals: Apply some cut to the guitar between 1KHz and 5KHz to bring the vocals to the front of the mix.
General: Apply a little boost between 100Hz and 250Hz and again between 10KHz and 12KHz.
fullness (240 Hz), bite (2.5 kHz), air / sizzle (8 kHz)
Acoustic Guitar:
Add Sparkle: Try some gentle boost at 10KHz using a Band Pass Filter with a medium bandwidth.
General: Try applying some mid-range cut to the rhythm section to make vocals and other instruments more clearly heard.
harshness / bite (2 kHz), boominess (120 - 200 Hz), cut (7 - 10 kHz)
Bass Guitar:
bottom (60 - 80 Hz), attack (700 - 1000 Hz), string noise (2.5 kHz)
Horns
fullness at 120 - 240 Hz, shrill at 5 - 7.5 kHz
Strings
fullness at 240 Hz, scratchiness at 7.5 - 10 kHz
Happy EQing.
Sunday, February 1, 2009
Getting pro sounding recordings on a budget.
After you get a DAW up and running it's time to get some recording done.
The cheapest way: M-Audio Audiophile 192, Rane MS-1b, SM58/SM57 mic. Pro recordings can be done with this. $450
The step-up: M-Audio Audiophile 192, Grace Design 101 or True Systems P-Solo or FMR - RNP "really nice mic-pre", FMR RNC "really nice compressor" (optional), SM7b mic. $950w/o compressor, $1150 with compressor.
Million Dollar sound for as cheap as it gets: M-Audio Audiophile 192, Black Lion Sparrow, any great mic pre (Trident S20, UA 610, Brent Averill 1272), FMR RNC "really nice compressor", Bock Audio 195. $3,000 [the only thing I might want to upgrade here eventually would be the compressor to a LA-2A, a 1176, a TubeTech, or a Distressor]
All of these set-ups will give you pro quality recordings. Just different levels of pro sound. But remember that how good your recordings will sound has everything to do with how you use your equipment and how good your mixing, eq, and mastering is. If you record everything perfect you can always ship your tracks to a mixing and mastering engineer untill you learn how to do it yourself.
Other needed equipment. Monitors, cables, headphones, and a headphone amp. Check my list of equipment at great values in one of my other post.
Getting a good DAW for cheap.
The major issues hear: CPU power, amount of RAM and speed of it, harddrive performance, ASIO soundcard, and software.
check out www.pricewatch.com for cheap computers or go around to yard sales and pick up non working computers for parts. I just built a dual core intel machine with 2 gb of ram for under $150 using spare parts I found.
Make sure that your cpu is at least dual-core. You need at least 1-2 gb of ram. The higher the number the better. Like 800 is better than 400. You need at least 160gb of harddrive space with a seperate harddrive for recording if you can afford it.
For soundcard get anything that has an ASIO driver. Any studio soundcard will do. Check out M-Audio soundcards. Firewire is better than USB and some people prefer PCI soundcards. Don't buy soundblasters.
Many soundcards come with recording software. If you don't have any DAW software you might want to buy a soundcard that comes with Cubase 4 Le. It's a great piece of software for free with good soundcards such as the Presonus Firebox.
The only softwares that i've really liked have been Cubase/Nuendo and ProTools. Sonar, Reaper, and Ableton Live are all good but they just weren't for me. Remember that Reaper is a great value.
For making instrumentals outside of recording software I like FL Studio and Reason.
List of great gear for a great value
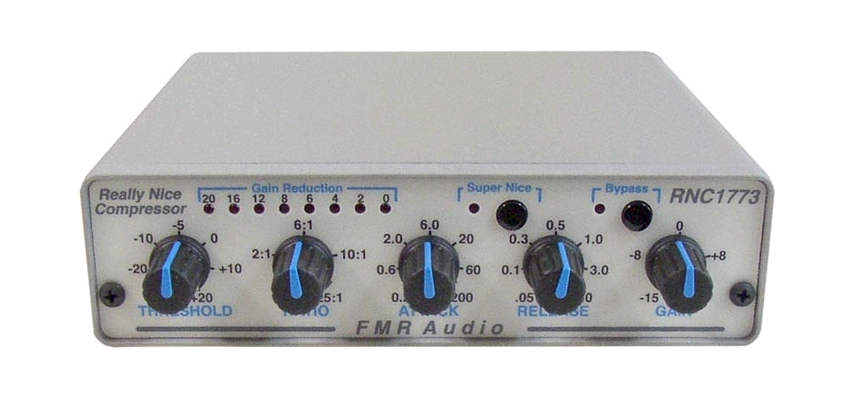
FMR - RNC "Really Nice Compressor" at less than $200 this is a great investment for hardware compression. This unit compairs to units that cost over 5 times the price.
Bock Audio Mics - Many people compare the 195 to the U87. But it sounds better at less than 1/3 of the price. ~$1,000 And the 151 is a vocal version of the 251 replica which at $3,000 is still a steal.


Rane - MS1b - For about $150 you can get a mic preamp that is actually worth using.

M-Audio - DMP3 - For about $150 you get two channels with d.i. inputs and VU meters. Not bad for the starting project studio.

Presonus - Blue Tube - Many people abuse the tube in this getting terrible recordings but with low drive settings and the right mic you can get usable recordings. Try the Bluebird mic on this. Pure magic. I don't know why. $199. Or get the single channel version Tube Pre for $99.

Black Lion Audio - Sparrow - At about $650 this kills every other converter that I've ever used. This is one of the best values I've ever seen. Pro converters for under $1,000.

Shure - SM7b - One of my favorite mics. Very surprising. Perfect for hip-hop. Used by David Banner and many others. Used on the Thriller Album for background vocals. Used in Country and Rock music. $250. Needs a good preamp to really push it though.

M-Audio - Audiophile 192 - Really a great sounding and low latency soundcard for the money. At less than $200 you can get the best soundcard in it's price range. Also runs with ProTools M-Powered.

M-Audio - Firewire 410/Profire 610 - Blows the M-box away. Just the output converters put the m-box2 to shame. Don't buy the M-box unless you are looking for a usb protools interface. Even then I might still go with a M-Audio Fasttrack Pro. About $300

Alesis - M1 Active MKII - Actually good mixing speakers if you take the time to get use to them. They don't have banging bass but that's not the most important thing when getting good mixes. Good for $300.

Yamaha - HS50m - At less than $400 a pair they are some of the easiest to learn mixing speakers and deliver great mixes. Don't waste your money on the 8" HS80m's. They don't deliver like these little guys.

Shure - SM57/SM58 - Every studio should have at least one. Great for hip-hop vocals and recording guitar amps. Also try the Audix i5. Same sound and price but built like a tank.

Sony - MDRV150 - At $15 these are the workhorse headphones of the poorman's studio. Not the best for booth use but come on. They are $15. I have a great pair for me to use, a good pair for the booth, and these for everyone else that wants to listen.

This will be updated regularly. Check back often.
Bock Audio Mics - Many people compare the 195 to the U87. But it sounds better at less than 1/3 of the price. ~$1,000 And the 151 is a vocal version of the 251 replica which at $3,000 is still a steal.
Rane - MS1b - For about $150 you can get a mic preamp that is actually worth using.
M-Audio - DMP3 - For about $150 you get two channels with d.i. inputs and VU meters. Not bad for the starting project studio.
Presonus - Blue Tube - Many people abuse the tube in this getting terrible recordings but with low drive settings and the right mic you can get usable recordings. Try the Bluebird mic on this. Pure magic. I don't know why. $199. Or get the single channel version Tube Pre for $99.
Black Lion Audio - Sparrow - At about $650 this kills every other converter that I've ever used. This is one of the best values I've ever seen. Pro converters for under $1,000.
Shure - SM7b - One of my favorite mics. Very surprising. Perfect for hip-hop. Used by David Banner and many others. Used on the Thriller Album for background vocals. Used in Country and Rock music. $250. Needs a good preamp to really push it though.
M-Audio - Audiophile 192 - Really a great sounding and low latency soundcard for the money. At less than $200 you can get the best soundcard in it's price range. Also runs with ProTools M-Powered.
M-Audio - Firewire 410/Profire 610 - Blows the M-box away. Just the output converters put the m-box2 to shame. Don't buy the M-box unless you are looking for a usb protools interface. Even then I might still go with a M-Audio Fasttrack Pro. About $300
Alesis - M1 Active MKII - Actually good mixing speakers if you take the time to get use to them. They don't have banging bass but that's not the most important thing when getting good mixes. Good for $300.
Yamaha - HS50m - At less than $400 a pair they are some of the easiest to learn mixing speakers and deliver great mixes. Don't waste your money on the 8" HS80m's. They don't deliver like these little guys.
Shure - SM57/SM58 - Every studio should have at least one. Great for hip-hop vocals and recording guitar amps. Also try the Audix i5. Same sound and price but built like a tank.
Sony - MDRV150 - At $15 these are the workhorse headphones of the poorman's studio. Not the best for booth use but come on. They are $15. I have a great pair for me to use, a good pair for the booth, and these for everyone else that wants to listen.
This will be updated regularly. Check back often.
Setting up a channel strip for recording vocals.
This is my channel strip setting guide that will work for almost any compressor, eq, pre amp set up. This is based on the Eureka though. But it still applies to other channel strips.
This will be for vocals.
Set everything to default.
PRE AMP- Line button [out], 48v [in] (for phatom powered mics), -20 db [out] (unless your signal is really loud then press in and start at step one agian), 80hz cut [in] (reduces boomyness), phase [out] (unless you have phase issues), Gain all the way down, impedance to match mic, saturate down (or to taste, mine is half up).
COMPRESSOR- Thresh to 0db, Attack between 9-11 o'clock, ratio to 1:1, Release between 12-3 o'clock, Gain to 0db, Sidechain 10 Hz. Soft [in], Bypass [in]
EQ- All to 0db. Eq>CMP [out] (could be used in), Bypass [in]
MASTER- 0db, GR to meter [out].
***Please read all of the setting marks on the Eureka (or your channel strip)***
Steps:
1) with someone doing a mic check slowly raise the gain untill the VU meter reads close to 0 dbVU without going over too bad though this unit doesn't clip easily.
2) Now turn bypass on the compressor off and the GR to meter on in the master section. Now turn the ratio to 4:1. Now turn the threashold slowly clockwise untill the VU meter starts hitting -3db at the peaks.
3) Now turn the GR to meter back off and turn the gain on the compressor so that it get back to 0dbVU in the meter.
4) Turn the eq bypass off. Then tweak eq to taste.
5) If you do alot of boosting with the eq then turn the master down to get a 0db reading in the meter. Turn up the master gain if you do alot of cutting. If no eq-ing is done then leave the master gain at 0dbVU (at 12 o'clock)
This is settings for general music recording applications.
For Hip-Hop or Rock vocals you might want to try a ratio of 8:1 with about -5db of gain reduction.
Remember that some DAW software uses a dbFS meter for input signal which is different than a dbVu meter. You want 0 dbVu which equals about -18 dbFs. Hope this helps.
Subscribe to:
Posts (Atom)
